


-
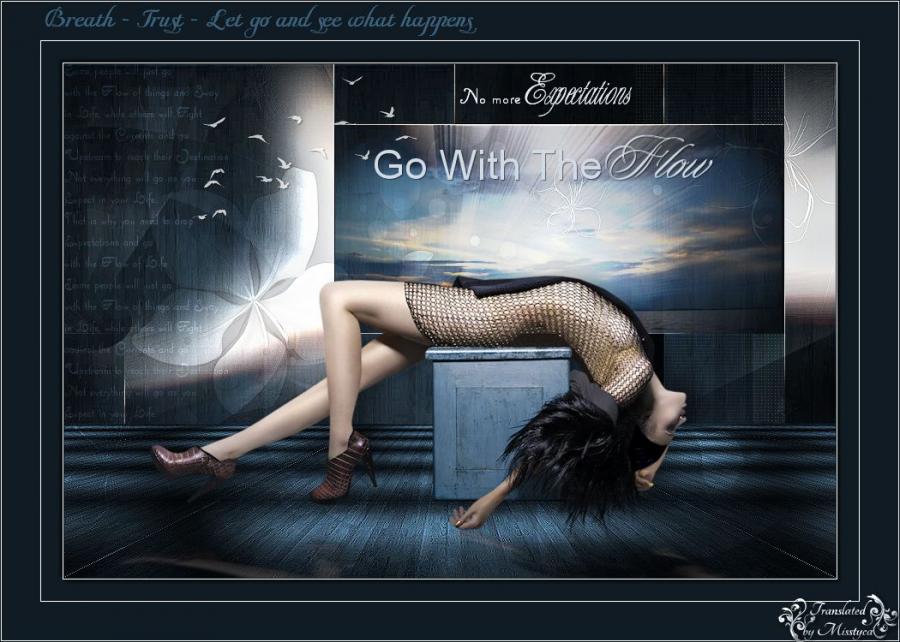
Go with the Flow - Karin

Köszönet Karinnak, hogy lehetővé tette számomra leírásának fordítását!
Az eredeti leírás K@D's PSP Designs tulajdona, melyet TILOS másolni, s más oldalon közé tenni!
Ez vonatkozik erre a fordításra is!
Heel Hartelijk Bedankt Karin!
Az eredeti leírást itt találod:

A leckét PSP X7 programmal készítettem, de elkészíthető más verziójú programmal is!
A bemutató képek eltérőek lehetnek!

Pluginok/Szűrök:
- VM Natural - Weave Distortion **
- Mura's Meister - Perspective Tiling
- Tramages - Pool Shadow **
- AP 01 (Innovations) - Lines-Silverlining
- It@lian Editors Effect - Effetto Fantasma
- Eye Candy 5 Impact - Perspective Shadow
A ** jelölt pluginok importálhatók az Unlimited 2.0 pluginok közé
Hozzávaló anyagot innen letöltheted:

Letöltés és kicsomagolás után:
- A Masks, Brushes mappában lévő brush fájlt nyisd meg a PSP programba, és exportáld a Custom Brushok közé eredeti néven
- A Presets mappában lévő .f1s fájlra 2-szer kattints, automatikusan importálódik
- A többi fájlt nyisd meg a programban
Megjegyzés:
- A képméret beállításnál a Resize all Layer NE legyen bejelölve, ellenkező esetben jelezni fogom!!!
Színpaletta:


Vagy az általad választott tube képből végy színeket, de ebben az esetben figyelj az elemek átszínezésére!!!
Kezdjünk is neki!
1.
- Nyisd a "370_KaD_Alfakanaal" fájlt, majd Window - Duplicate-val duplázd meg, az eredetit zárd be
- Select All jelöld ki
- Nyisd meg a "370_Background" képet, másold, majd Paste Into Selectionként rakd a kijelölésbe
- Effects - Edge effects - Enhance
- Marad a kijelölés!!!
2.
- Rakj rá egy Új réteget
- Nyisd meg az "Alies 1-2VR272_women_..." képet, másold, majd Paste Into Selectionként rakd a kijelölésbe
- Szüntesd meg a kijelölést
- Adjust - Blur - Radial Blur

- Plugins - VM Natural - Weave Distortion

- Effects - Edge effects - Enhance
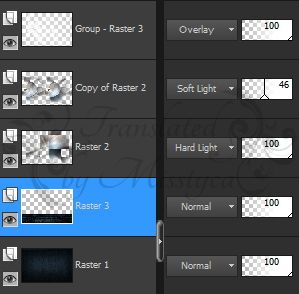
- A rétegbeállításnál a Blend Mode-t állítsd át Hard Light-ra
3.
- Duplázd meg a réteget
- Effects - Distortion effects - Polar Coordinates

- Effects - Image effects - Seamless Tiling - Side by Side beállítás
- A rétegbeállításnál a Blend Mode-t állítsd át Soft Light-ra, az átlátszóságot vedd le 46%-ra
4.
- Rakj rá egy Új réteget
- Töltsd ki
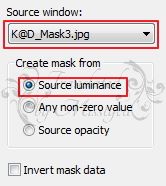
színnel- Layers - New Mask Layer - From Image
- Merge Grouppal vond össze a mask rétegeket
- Adjust - Sharpness - Sharpen
- Mirrorral (Mirror Horizontal) tükrözd meg a képet
- A rétegbeállításnál a Blend Mode-t állítsd át Overlay-ra
5.
- Állj a Raster 1 rétegre
- Edit - COPY másold ezt a réteget
- Selections - Load/Save Selection - Load Selection from Alpha Channel - Keresd a "Selectie 1" beállítást
- Rakj rá egy Új réteget
- Majd Paste Into Selectionként rakd rá az előzőekben másolt képet
- Szüntesd meg a kijelölést
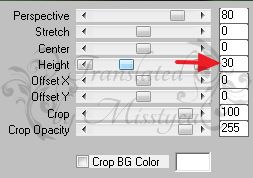
- Plugins - Mura's Meister - Perspective Tiling
- Effects - Edge effects - Enhance
- Plugins - Tramages - Pool Shadow

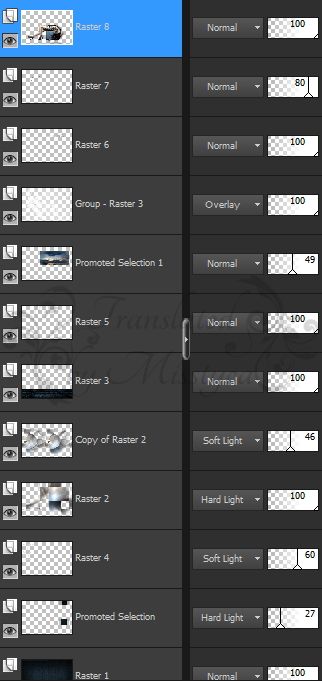
Itt tartasz jelenleg:

6.
- Layers - Arrange - Move Up - 2-szer ismételd meg
7.
- Állj a Raster 1 rétegre
- Selections - Load/Save Selection - Load Selection from Alpha Channel - Keresd a "Selectie 2" beállítást
- Promote Selection to Layer
- Plugins - AP 01 (Innovations) - Lines-Silverlining

- Szüntesd meg a kijelölést
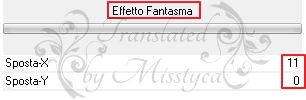
- Plugins - It@lian Editors Effects - Effetto Fantasma
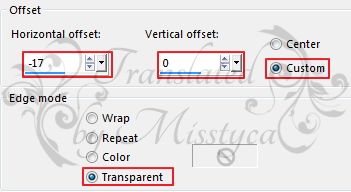
- Effects - Image effects - Offset
- A rétegbeállításnál a Blend Mode-t állítsd át Hard Light-ra, az átlátszóságot vedd le 27%-ra
8.
- Nyisd meg a "370_KaD_Text1" képet, másold, majd Paste as New Layerként rakd a képedre
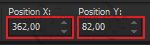
- Aktiváld a Pick Tool-t (K), s a kép szerinti beállítással helyezd a képet

- A rétegbeállításnál a Blend Mode-t állítsd át Soft Light-ra, az átlátszóságot vedd le 60%-ra
9.
- Nyisd meg a "370_KaD_Text2" képet, másold, majd Paste as New Layerként rakd a képedre
- Layers - Arrange - Bring to Top
- Aktiváld a Pick Tool-t (K), s a kép szerinti beállítással helyezd a képet

10.
- Nyisd meg a "370_KaD_Text3" képet, másold, majd Paste as New Layerként rakd a képedre
- Aktiváld a Pick Tool-t (K), s a kép szerinti beállítással helyezd a képet
- Effects - 3D effects - Drop Shadow 1 / 1 / 50 / 1 Fekete
11.
- Rakj rá egy Új réteget
- Aktiváld a Brush Tool-t, s keresd az elején exportált "bird_brushes_by_lpdragonfly" brusht. Vedd le a méretét 300-ra, majd
színnel 2-szer kattints a képen mutatott helyre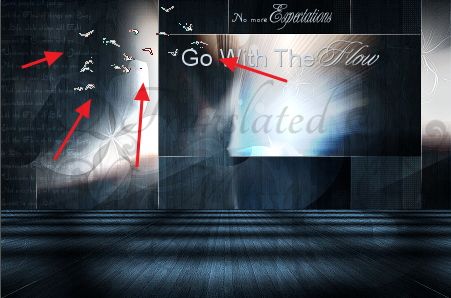
- Effects - 3D effects - Drop Shadow 1 / 1 / 50 / 1
- Adjust - Sharpness - Sharpen
- Az átlátszóságot vedd le 80%-ra
12.
- Állj a Raster 1 rétegre
- Selections - Load/Save Selection - Load Selection from Alpha Channel - Keresd a "Selectie 3" beállítást
- Promote Selection to Layer
- Layers - Arrange - Move Up - 6-szor ismételd meg
- Az átlátszóságot vedd le 62%-ra
- Marad a kijelölés!!!
13.
- Nyisd az "SvB Water 7 misted" képet, másold, majd Paste as New Layerként rakd a képedre
- A képméretet vedd le 65%-ra
- Helyezd el a kijelölésbe, lásd a kész képet
- Selections - Invert fordítsd meg a kijelölést
- Nyomj egy DEL billentyűt
- Szüntesd meg a kijelölést
- Merge Downnal vond össze az egymás alatti rétegeket
- Az átlátszóságot vedd le 49%-ra
- Layers - Arrange - Move Down
- Adjust - Sharpness - Sharpen more
14.
- Nyisd meg az " Alies 1-2VR272_women_..." képet, másold, majd Paste as New Layerként rakd a képedre
- Layers - Arrange - Bring to Top
- A képméretet vedd le 90%-ra
- Aktiváld a Pick Tool-t (K), s a kép szerinti beállítással helyezd el a tubét

- Effects - 3D effects - Drop Shadow 0 / 17 / 30 / 25 Fekete
- Plugins - Eye Candy 5 Impact - Perspective Shadow - Keresd a "370_KaD Perspective Shadow" beállítást
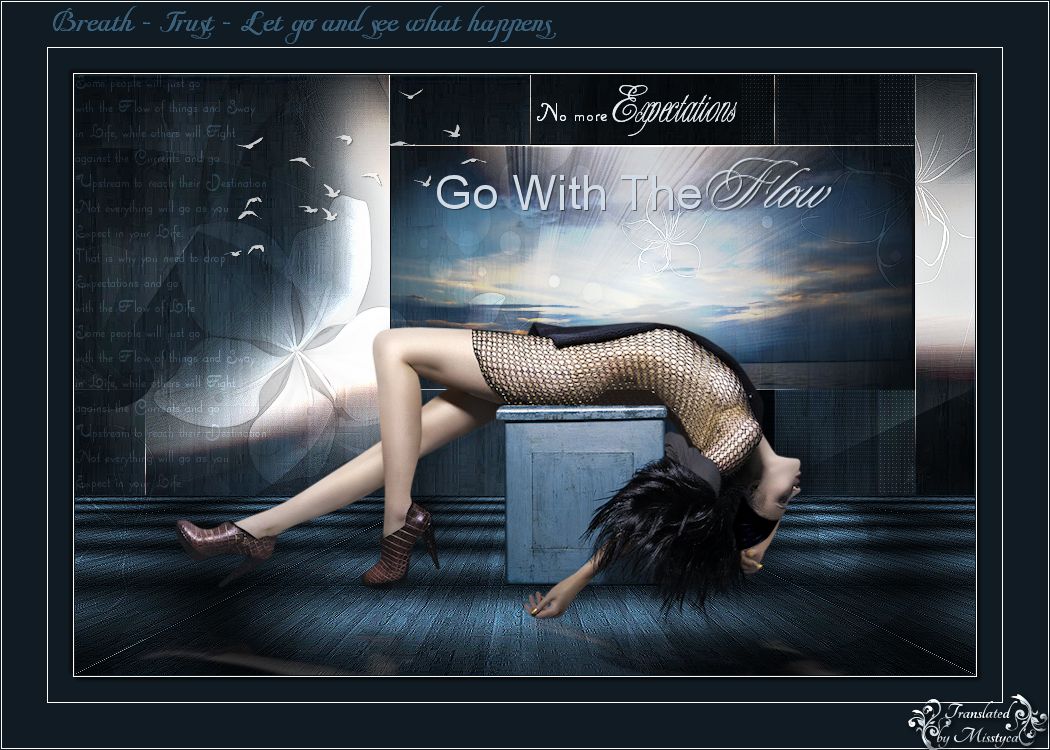
Itt tartasz jelenleg:
/Ha a rétegek elhelyezkedése nem egyezik, akkor rendezd a kép szerint, különben nem fog mutatni!/

- Merge All vond össze az összes réteget
15.
- Add Borders - 1 px -
- Add Borders - 1 px -
- Select All jelöld ki
- Add Borders - 25 px -
- Effects - 3D effects - Drop Shadow -3 / -3 / 65 / 5 Fekete
- Effects - 3D effects - Drop Shadow 3 / 3 / 65 / 5 Fekete
- Szüntesd meg a kijelölést
- Add Borders - 1 px -
- Add Borders - 45 px -
16.
- Nyisd meg a "370_KaD_Text4" képet, másold, majd Paste as New Layerként rakd képedre
- Helyezd el a bal felső sarokban, lásd a kész képen
- Adjust - Sharpness - Sharpen
17.
- Add Borders - 1 px -
- Add Borders - 1 px -
- A képméretet vedd le 900 px, a Resize All Layer LEGYEN bejelölve
- Új rétegen helyezd el rajta a neved
- Mentsd el JPEG formátumban
Bízom benne, hogy sikerült elkészíteni, s jól éreztétek magatokat közben!
Nagyon szívesen venném, ha az elkészíttet leckeképet e-mail formájában elküldenéd nekem, vagy Facebook oldalamon megosztanád, hogy itt oldalamon meg tudnám osztani!
Ide kattintva írhatsz nekem levelet!


Egy másik verzió tőlem:
Tube: by Malacka

Köszönöm Cicka

-
Comments


Klassz lett Dórika !